Unboxing and Inventory of Graco Benton 5-in-1 Convertible Crib
Start by carefully unboxing the crib and inventorying all components. Ensure all hardware and parts are included and undamaged. Refer to the manual for a detailed list and check for any damage or missing items to ensure safety.
1.1. Understanding the Components and Hardware
Understanding the crib’s components is crucial for proper assembly. The package includes the crib frame, mattress support, side panels, and conversion kits. Hardware consists of bolts, screws, and an Allen wrench. Familiarize yourself with each part using the manual. Ensure all items are present and undamaged. This step ensures a safe and proper assembly process, preventing future issues and ensuring stability.
1.2. Checking for Damaged or Missing Parts

Inspect all components for damage or wear. Verify the crib frame, side panels, mattress support, and hardware are intact. Cross-reference the manual’s parts list to ensure nothing is missing. Damaged or missing parts can compromise safety and stability. If issues are found, contact customer support for replacements before proceeding with assembly.

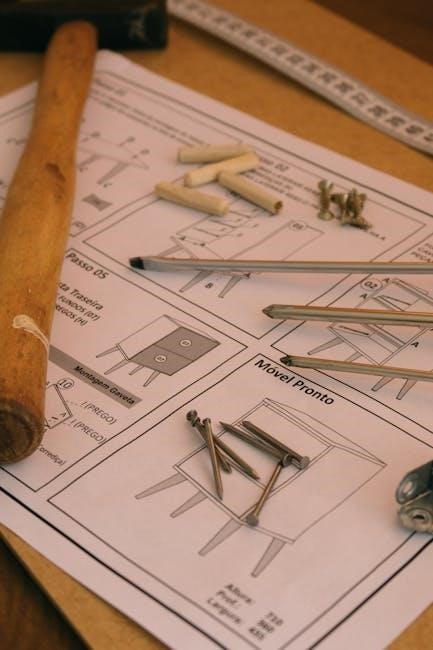
Tools Required for Assembly
The assembly requires an Allen wrench, screwdriver, and hammer. Ensure all tools are readily available to facilitate a smooth and efficient assembly process.
2.1. List of Essential Tools (Allen Wrench, Screwdriver, Hammer)
The assembly process requires a few essential tools, including an Allen wrench for securing bolts, a screwdriver for driving screws, and a hammer for gently tapping parts into place. Ensure these tools are readily available to avoid delays. Having the right tools ensures a secure and stable crib assembly, which is critical for your child’s safety and the product’s durability.
2.2. Importance of Having the Right Tools for Safe Assembly
Using the correct tools ensures a safe and proper assembly of the crib. Improper tools can lead to stripped screws, loose joints, or uneven surfaces, which may compromise the crib’s stability and safety. The right tools also help prevent damage to the crib’s components, ensuring a secure and durable structure for your child to sleep safely and comfortably.

Safety Precautions and Guidelines
Always follow safety guidelines to ensure a secure and stable crib setup. Read the manual thoroughly, avoid soft bedding, and prevent hazards. Proper assembly prevents risks like entrapment or suffocation, ensuring your child’s safety and well-being.
3.1. Reading the Manual Thoroughly Before Starting
Reading the manual thoroughly is essential for a safe and successful assembly. It provides detailed step-by-step instructions, safety guidelines, and component identification. Understanding the process ensures proper assembly, prevents errors, and minimizes risks of hazards. Always follow the manufacturer’s instructions to guarantee your crib is assembled correctly and securely for your child’s safety.
3.2. Ensuring a Safe Environment for Assembly
A safe environment is crucial for assembling the crib. Clear a large, flat workspace and ensure good lighting. Protect the floor with a soft cloth or mat to prevent scratches. Keep children and pets away to avoid distractions. Wear comfortable clothing and ensure all tools are within reach. A calm and organized workspace helps prevent accidents and ensures focus during assembly.
3.3. Avoiding Soft Bedding and Padding for Infant Safety
Never add soft bedding, pillows, or padding to the crib, as they pose suffocation risks. Use a tight-fitting mattress and a crib sheet specifically designed for safety. Avoid placing toys or loose items inside the crib. Ensure the mattress support is at the correct height for your baby’s stage. Soft materials can create gaps where infants may get trapped, so keep the crib bare for their protection.

Step-by-Step Assembly Instructions
Follow the manual’s detailed guide to assemble the crib systematically. Begin with the frame, then attach the sides and mattress support. Use the provided Allen wrench and screwdriver for secure fastening. Ensure all bolts are tightened properly and double-check each step for accuracy and safety.
4.1. Assembling the Crib Frame and Base
Begin by unboxing and organizing all components. Attach the crib frame parts using the Allen wrench to secure bolts tightly. Align the sides properly and ensure they fit snugly. Next, attach the base by following the manual’s instructions. Use the screwdriver for any additional screws. Double-check that all parts are aligned and stable before moving to the next step.
4.2. Attaching the Mattress Support and Sides
Attach the mattress support to the crib frame using the provided bolts and Allen wrench. Ensure it is level and securely fastened. Next, align the crib sides with the frame and connect them using screws. Tighten all connections firmly. Finally, verify that the sides are stable and properly aligned to ensure safety and prevent any gaps or movement.
4.3. Converting the Crib to a Toddler Bed
To convert the crib to a toddler bed, remove one side panel and lower the mattress to its lowest position. Use the Allen wrench to detach the fixed side and attach the toddler rail. Ensure all bolts are securely tightened. Double-check the stability and alignment to guarantee a safe transition for your child. Always refer to the manual for specific guidance.
Configuration Options for the Crib
The Graco Benton crib offers versatile configurations, including a toddler bed, daybed, and full-size bed. Adjust the mattress height to suit your child’s growth stages seamlessly.
5.1. Adjusting the Mattress Height for Different Stages
The Graco Benton crib features an adjustable mattress support base, allowing you to lower or raise the mattress as your child grows. Use the Allen wrench to adjust the height settings. For infants, the highest position is recommended, while toddlers and older children require lower settings. Ensure the mattress fits snugly at each stage, following the manual’s guidelines for safe and proper adjustment.
5.2. Converting to a Daybed and Full-Size Bed
To convert the crib into a daybed, remove the crib side and attach the included conversion rail. For a full-size bed, use the provided bed frame and support hardware. Ensure all bolts are securely tightened. The adjustable mattress support base adapts to these configurations, maintaining safety and comfort. Follow the manual’s specific instructions for each conversion stage to ensure stability and proper assembly.

Final Safety Checks and Verification
After assembly, ensure all bolts and joints are tightly secured. Double-check for any looseness and verify that the crib meets all safety standards for stability and durability.
6.1. Ensuring All Bolts and Joints Are Secure
Tighten all bolts and joints firmly using the provided tools, such as an Allen wrench or screwdriver. Double-check each connection to ensure stability and prevent any wobbling. For added security, use a torque wrench to apply even pressure. Regularly inspect and tighten hardware to maintain safety and durability over time.
6.2. Checking for Gaps Between the Mattress and Crib Sides
After assembly, ensure the mattress fits snugly within the crib sides to prevent gaps. Measure the mattress and crib dimensions to confirm proper fit. Gaps can pose suffocation risks, so verify alignment and tightness. If the mattress is too small, it may leave dangerous spaces. Always use a mattress designed for the Graco Benton crib to ensure safety and compliance with standards.
Maintenance and Care Tips
Regularly clean the crib with mild soap and water. Tighten all hardware periodically to ensure stability. Avoid harsh chemicals to maintain the finish and safety of the crib;
7.1. Cleaning the Crib Regularly
Use mild soap and water to clean the crib surfaces. Avoid harsh chemicals to prevent damage to the finish. Spot clean stains immediately to prevent them from setting. Regular cleaning ensures a safe and hygienic environment for your baby. Always check for loose joints or hardware after cleaning to maintain stability and safety.
7.2. Tightening Hardware Periodically
Regularly inspect and tighten all bolts and joints to ensure the crib remains stable. Use an Allen wrench or screwdriver as needed. Check for any loose parts, especially after moving or cleaning. Tightening hardware periodically prevents wobbling and ensures long-term safety. Address any loose components immediately to avoid potential hazards and maintain the crib’s structural integrity for your baby’s safety.

Troubleshooting Common Assembly Issues
Address common issues like parts not fitting properly or loose joints by referring to the manual. Tighten any loose hardware and ensure proper alignment for stability.
8.1. Resolving Loose Joints or Hardware
If joints or hardware feel loose during assembly, tighten all bolts using an Allen wrench or screwdriver. Ensure connections are secure and aligned properly. Double-check for stability and refer to the manual for specific tightening sequences. Addressing loose parts promptly prevents wobbling and ensures the crib’s structural integrity and safety for your child.
8.2. Addressing Gaps or Misalignment
If gaps or misalignment occur, inspect the crib for improper assembly. Recheck the instructions to ensure all parts are correctly aligned. Gently loosen nearby bolts, realign the sections, and tighten securely. Verify the mattress fits snugly within the crib sides to prevent entrapment risks. If issues persist, contact Graco customer support for assistance or replacement parts to ensure safety and stability.

Additional Resources and Support
For additional support, visit the official Graco website for manuals, assembly videos, and troubleshooting guides. Contact customer service at 1-800-GRACO-11 or www.graco.com/support today.
9.1. Accessing the Official Graco Manual and Videos
To access the official Graco Benton 5-in-1 Convertible Crib manual and assembly videos, visit the Graco website. Download the PDF manual for model numbers like 04521-331-MB or watch step-by-step assembly videos. The manual is also available in multiple languages and includes detailed safety guidelines. For additional help, refer to the customer service contact information provided in the manual or on the Graco website.
9.2. Contacting Customer Service for Assistance
For any assembly-related questions or issues, contact Graco’s customer service. Visit their official website for contact details, including phone numbers, email, and live chat options. Representatives are available to assist with troubleshooting, missing parts, or clarifying instructions. Ensure to have your product model number handy for efficient support. Graco’s customer service is committed to helping you complete the assembly safely and correctly.
Successfully assembling the Graco Benton crib ensures a safe and sturdy sleeping environment for your baby. Following the instructions carefully is crucial for your child’s safety and your peace of mind. This convertible crib offers long-term value and versatility, adapting to your child’s growth. With proper assembly and maintenance, it provides a reliable and comfortable space for years to come. The effort invested in assembly is well worth the result.
10;1. Summary of Key Assembly Steps
Begin by unboxing and inventorying all parts, ensuring nothing is damaged or missing. Gather tools like an Allen wrench and screwdriver. Start by assembling the crib frame, then attach the sides and mattress support. Follow manual instructions for converting to a toddler bed and adjusting mattress height. Double-check all bolts and joints for security. Verify the crib’s stability and ensure proper mattress fit before use.
10.2. Importance of Following Instructions for Safety
Following the assembly instructions ensures the crib is built correctly, preventing potential hazards. Proper assembly guarantees stability, preventing loose joints or gaps that could harm your child. Always adhere to safety guidelines, like avoiding soft bedding, to create a secure environment. Deviating from instructions risks compromising safety and durability, so careful adherence is crucial for your child’s protection and well-being.